If you’ve found yourself in a situation where your Samsung M23 needs an LCD replacement, you're not alone. Replacing an LCD screen will bring your gadget back whether from a drop, an accident, or wear and tear. This detailed manual will help you through the whole LCD replacement process on your Samsung M23.
Required Tools and Materials
Make sure you have the following ready before beginning the replacement process:
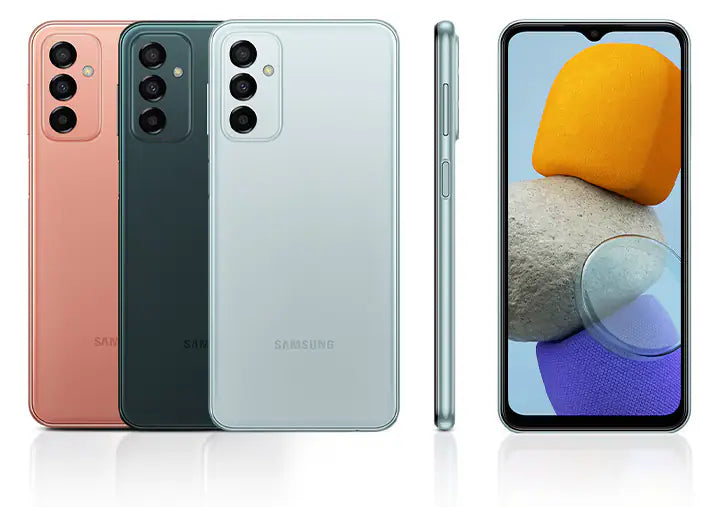
- Replacement LCD Screen: Make sure it is compatible with the Samsung M23.
- Precision Screwdriver Set: A set of small screwdrivers, including Pentalobe and Phillips.
- Plastic Pry Tools: To help separate components without causing damage.
- Suction Cup Tool: Useful for lifting the screen safely.
- Tweezers: For handling small screws and components.
- Heat Gun or Hair Dryer: To soften adhesive when necessary.
- Anti-Static Wrist Strap: To prevent electrostatic discharge (optional but recommended).
Step-by-Step Replacement Process
Step 1: Power Off the Device
Make sure your phone is totally off before beginning any repair job. This stops short circuits and any electrical harm throughout the replacement process.
Step 2: Remove the Back Cover
- Use a Heat Gun or Hair Dryer: Apply light heat around the back cover's borders to softening the glue using a heat gun or hair drier.
- Insert Plastic Pry Tools: Carefully slip a pry tool into the space separating the phone body from the back cover. Working your way around, gently separate the back cover.
- Remove the Cover: Once you’ve loosened it, gently lift it off and set it aside.
Step 3: Disconnect the Battery
- Locate the Battery Connector: Identify the battery connection point on the motherboard.
- Disconnect the Battery: Gently raise the battery connector from its socket using your tweezers or plastic pry tool. This is the most important step to prevent any power passing through the gadget.
Step 4: Remove the Screws Holding the LCD
- Identify the Screws: Find and name the screws that fasteners the LCD to the device's frame. Usually, these are Phillips screws.
- Unscrew Carefully: Carefully remove all of the screws using the suitable screwdriver and keep them in a secure location.
Step 5: Detach the LCD Screen
- Apply Heat: Apply light heat around the borders of the LCD to soften the adhesive should it be bonded down.
- Use a Suction Cup Tool: Place the suction cup tool on the screen, tugging gently to create a gap.
- Insert a Pry Tool: Once a space has created, gently detach the LCD from the frame using a plastic pry tool. Spend some time making sure you don't harm any internal parts.
Step 6: Disconnect the LCD Cable
- Locate the LCD Cable Connection: Find the LCD cable connection—where the LCD cable hooks to the motherboard.
- Carefully Disconnect the Cable: Use tweezers or a plastic tool to gently lift the connector and remove the LCD cable.
Step 7: Install the New LCD Screen
- Connect the New LCD: Align the connector of the new LCD with the motherboard connection port then gently press it in until it clicks firmly.
- Secure the LCD: Lay the LCD in place, ensuring it sits correctly in the frame.
Step 8: Reattach the Screws
- Replace All Screws: Replace all screws that fasteners the LCD in place by gently reattaching them with a screwdriver.
Step 9: Reconnect the Battery
- Reattach the Battery Connector: Align the battery connector with its socket and press it down firmly to secure it.
Step 10: Replace the Back Cover
- Align the Back Cover: Place the back cover on the device, ensuring all edges are aligned properly.
- Press Firmly: Apply gentle pressure all around the edges to ensure the adhesive seals properly.
Step 11: Power On the Device
Press the power button to activate your Samsung M23 once all is linked and secured. See to it the new LCD is operating as it should. Test general display performance, colour accuracy, and touch sensitivity.
Although replacing the LCD on your Samsung M23 could appear difficult, by using these methodical methods you will be able to do the work with assurance. Always give using appropriate components first priority, then work carefully to guarantee a good repair. See a professional technician if you run into any problems or feel unsure at any one time.

Top Tips for Samsung M23 LCD Installation
Although replacing the LCD in your Samsung M23 can be a fulfilling hobby, it also calls for meticulous attention to detail to guarantee a good installation. Whether you enjoy first-time repairs or are a seasoned do-it-yourselfer, these top advice can help you easily negotiate the procedure.
1. Gather All Necessary Tools and Components
Make sure you have everything you may possibly need just before you begin:
- Replacement LCD Screen: Ensure it's compatible with the Samsung M23.
- Precision Screwdriver Set: A set that includes various types like Phillips and Pentalobe.
- Plastic Pry Tools: These will help in separating parts without causing damage.
- Suction Cup Tool: Useful for lifting screens gently.
- Tweezers: Handy for handling small screws and components.
- Heat Gun or Hair Dryer: To soften adhesive during the installation process.
- Anti-static Wrist Strap: Use it to prevent electrostatic discharge, which can damage electronic parts.
2. Work in a Clean, Well-Lit Environment
Crucially, your desk needs to be tidy and properly lit. This lowers the chance of losing screws or breaking parts and lets you properly view little components. Clear your workstation of clutter so you have enough space to operate.
Read: Samsung M23 LCD Compatible| Everything You Need to Know
3. Power Off Your Device and Remove the Battery
Before you start, always be sure your phone is totally off. This stops various electrical problems such inadvertent short circuits. Disconnect the battery to guarantee that, following power down, no electricity is going through the device during the repair process.
4. Take Your Time when Detaching Components
Take your time pulling off the rear cover and separating the LCD. Warm the glue to make prying apart the parts simpler. By using a moderate and consistent method, you will aid to prevent harming the screens or breaking any clips.
5. Document the Disassembly Process
As you break down your Samsung M23, think about snapping pictures or noting things. When you are putting everything back together, this material might be quite helpful. It also makes sure you don overlook the screw arrangement or component positioning.
6. Check the Alignment of the New LCD
Make sure the replacement LCD is exactly aligned with the frame of the gadget when being installed. Problems with touch sensitivity and functional performance may follow from misalignment. Before screws are used to secure the screen, make sure it sits tightly and evenly.
7. Be Mindful of Ribbon Cables
Generally speaking, a ribbon cable connects the LCD to the motherboard. Handle this ribbon cable carefully; avoid straight tugging on it and take your time joining or disconnecting it to avoid tears or damage.
8. Use Quality Replacement Parts
Choose premium replacement LCDs always, ideally OEM (Original Equipment Manufacturer) parts or reliable aftermarket choices. Better compatibility, lifetime, and performance guaranteed by quality parts help to reduce future problems.
9. Test the New LCD Before Fully Reassembling
Reconnect the battery (without the back cover attached) and power the device to test the new screen once the new LCD is set in place. Before totally reversing your disassembly actions, look for functionality including touch responsiveness, colour correctness, and any potential display problems. This saves time should you have to fix or troubleshoot anything.
10. Reassemble with Care
Make sure all clips are well attached and that all screws are replaced in their original locations when reassembling. Don't hurry this step; before sealing the device, make sure everything is correctly linked twice-checked.
11. Clean the Screen Before Sealing
Use a microfiber cloth to clean your new screen so any fingerprints, dust, or smudges are gone before covering it.
A cleaned screen improves the overall look of your fixed gadget. If you approach replacement of the LCD on your Samsung M23 deliberately, it might be a simple task.
Following these guidelines—taking your time, recording procedures, using quality components, and verifying functionality—you can make sure your repair is successful.
Restoring your smartphone to its previous state will pay off far more than the work and attention this endeavour requires!
Common Samsung M23 LCD Issues and Fixes
Popular smartphone with dynamic display and easy interface is the Samsung M23. Over time, though, it can develop a range of LCD-related problems, just like any gadget. This manual will go over some typical Samsung M23 LCD issues and possible solutions to help your gadget run as it should.
1. Cracked or Shattered Screen
Issue
Accidental accidents or drops can cause a cracked or shattered LCD panel, therefore compromising its utility and appearance.
Fix
- Replacement: The best fix for the broken LCD screen is replacement. See a qualified technician or follow a do-it-yourself guide for the replacement procedure.
- Temporary Measures: If quick replacement is not possible, think about using a screen protector to stop more cracking and guarantee safer usage until replacement can be carried out.
2. Unresponsive Touch Screen
Issue
Users may find it challenging to navigate the gadget if their touch screen develops unresponsibility.
Fix
- Restart the Device: Often unresponsive touch problems can be resolved with a basic reset.
- Check for Software Updates: Ensure that your device is up to date with the latest software as updates can contain bug fixes that improve touch screen responsiveness.
- Calibration: If the problem persists, you can look for calibration options within your device settings. Note that this may not be available on all devices.
- Replace the LCD: If none of the above solutions work, it may indicate a hardware failure requiring an LCD replacement.
3. Color Distortion or Display Issues
Issue
Some users might find that the display's colours seem distorted, washed out, too saturated, therefore compromising the viewing experience.
Fix
- Reboot the Device: This can sometimes correct temporary glitches.
- Display Settings: Check the display settings to ensure your screen mode—that is, Vivid or Natural—is set appropriately. (e.g., Vivid or Natural).
- Factory Reset: Should issues continue, you can do a factory reset following a backing up of critical data. This solves display problems connected to software.
- LCD Replacement: Should the distortion persist, a hardware problem could be responsible; hence, it is advised to replace the LCD panel.
4. Flickering or Flashing Screen
Issue
A flickering or flashing screen may cause distraction and indicate underlying LCD or device software problems.
Fix
- Safe Mode: Boot your gadget in safe mode to see whether a third-party app is generating the problem. Should the flickering stop in safe mode, an app is most likely the source and you should delete dubious apps.
- Update Software: Make sure your device is running the most recent software version since upgrades often address similar problems.
- Hardware Inspection: Should the issue continue, look inside the display connectors as they may be loose. For this, you could need expert help for correct diagnosis and repair.
5. Screen Freezes or Stutters
Issue
Occasionally, the screen may freeze or stutter during use, hindering functionality.
Fix
- Restart the Device: Restarting may help to resolve temporary glitches or software lag.
- Clear Cache: Navigate to Settings > Apps and clear the cache for any apps that frequently freeze.
- Factory Reset: Should the problem persist, think about a factory reset following data backup as this can fix more severe software-related problems possibly compromising screen performance.
- LCD Replacement: If freezing is persistent and occurs even after resets, the LCD might be failing, necessitating a replacement.
6. Dark Spots or Image Retention
Issue
Dark areas or picture retention could compromise the viewing experience by leaving ghostly images or portions of the screen devoid of proper colour range.
Fix
- Restart the Device: This may help clear temporary display issues.
- Adjust Brightness Levels: Sometimes the visibility of dark spots can be mitigated by adjusting brightness in display settings.
- LCD Replacement: Should the issue be serious or recurring, replacing the LCD is the best way to guarantee best display functionality. .
Conclusion
Read: Where to Buy Peterhot Bluetooth Speaker in UK? Why FONES52?
Share:
Samsung M23 LCD Specifications Guide
iPhone 14 Pro Max Student Discounts in the UK | E-Tech61