A cracked or malfunctioning screen can severely hinder the usability and aesthetic appeal of your Samsung Galaxy S8. Whether your display is shattered, your touch function is glitchy, or the AMOLED has gone black, screen replacement is a feasible solution that doesn't always require a trip to a service center. In this comprehensive guide, we walk you through step-by-step instructions on Samsung S8 Screen Replacement, using clear, humanized language that simplifies the process—even for first-timers.
And for those who'd rather let a pro handle it, E-Tech Parts Plus is a reputable place to consider. They offer reliable repair services and even stock original parts if you prefer doing it yourself with quality gear.
Why Samsung S8 Screen Replacement Isn’t Like Replacing a Case?
Let’s start with some straight talk: replacing a screen isn’t like swapping a phone case or sticking on a screen protector.
The Galaxy S8 was beautifully engineered, but that sleek design comes at a cost—mainly, accessibility. Everything’s glued tight. The glass is curved. And the AMOLED panel? Incredibly fragile.
But that doesn’t mean it’s impossible.
It just means you’ll need to go slow, use the right tools, and follow each step carefully. And don’t worry—we’ll guide you the whole way.
Things You’ll Absolutely Need Before You Start
Before diving in, make sure you’re prepped. Running around for tools midway through is a sure way to lose screws, misplace parts, or worse—break something.
Core Tools:
-
New screen (with or without frame; more on that later)
-
Hairdryer or heat gun (for softening glue)
-
Plastic opening picks/tools (no metal!)
-
Suction cup
-
Tweezers
-
Small Phillips screwdriver (#00)
-
Spudger
-
Isopropyl alcohol (90% or higher)
-
Pre-cut adhesive strips or strong double-sided phone adhesive
Nice to Have:
-
Magnetic mat (keeps screws in order)
-
Nitrile gloves (keeps fingerprints off the inside)
-
Anti-static wrist strap (for extra precaution)
If you don’t have these, many repair kits online come bundled with all the essentials.
Step 1: Power Down and Eject the SIM Tray
Sounds basic, but it’s essential. You don’t want any power running through the phone while you work.
-
Turn off the Galaxy S8 completely.
-
Use the SIM ejector tool (or a paperclip) to remove the SIM card tray from the top.
-
Place the tray somewhere safe—it’s small and easy to forget about.
Step 2: Gently Heat the Back Glass to Loosen the Glue
Samsung loves adhesive. Lots of it. Especially around the back glass.
-
Use your heat gun or hairdryer to warm the edges of the back for 2–3 minutes.
-
Work in circles—don’t focus on one spot too long. You’re trying to soften the glue, not melt internal components.
Step 3: Pry Open the Back Cover (Slowly!)
Here’s where patience pays off.
-
Place a suction cup on the back glass (near a warm edge).
-
Gently lift, just enough to slip in a plastic pick or tool.
-
Slowly slide the tool around the phone to cut through the adhesive.
-
Be extra cautious near the fingerprint sensor at the top—it’s connected via a delicate cable.
Once loosened, lift the back cover and use a plastic spudger to unplug the fingerprint sensor cable from the motherboard.
Step 4: Remove Internal Components (Layer by Layer)
Now that we’re inside, you’ll see the wireless charging pad, the battery, motherboard, and lots of screws. Time to break it down:
-
Unscrew all visible Phillips screws (use a magnetic pad to track them).
-
Remove the NFC module and wireless charging coil.
-
Disconnect the battery first to stay safe.
-
Unplug all connectors—display cable, cameras, sensors, charging port.
-
If you’re using a new screen without a frame, you’ll need to remove the motherboard. If it has a frame, skip straight to transferring components.
Step 5: Carefully Remove the Old Screen
If you’re installing just a screen (not the whole frame), you’ll need to remove the broken one without damaging the internals.
-
Reheat the front of the phone, especially the screen edges.
-
Use a suction cup and gently work a pick underneath the display.
-
Don’t force it—go slow. These OLED screens are thin and can break with too much pressure.
-
Disconnect the screen cable once the display is off.
Tip: If this part makes you nervous, you’re not alone. Many DIYers opt for a screen with the frame already attached, which skips this risky step entirely.
Step 6: Clean the Frame for the New Screen
Leftover adhesive will prevent the new screen from sitting properly.
-
Use isopropyl alcohol and a soft cloth to wipe away any gunk.
-
Make sure the surface is smooth, dry, and free of debris.
-
Apply new adhesive strips along the edges.
If you’re using a screen with a frame, you’ll transfer everything into the new shell, so this step will be slightly different.
Step 7: Install the New Screen
If you're installing only the screen:
-
Gently feed the display cable through the frame.
-
Align the screen and press down gently so the adhesive bonds.
-
Secure with clips or rubber bands for 15–20 minutes.
If you're using a new frame:
-
Transfer all the internals—motherboard, cameras, charging port, battery.
-
Reconnect all the flex cables exactly where they were.
-
Take your time. One missed connection and the phone won’t power on.
Step 8: Reassemble the Internals and Test Everything
Before sealing it up, it’s smart to test.
-
Reconnect the battery and briefly power on the phone.
-
Check the screen: is it lighting up properly? Is the touch working?
-
Test other functions: camera, speaker, Wi-Fi, fingerprint sensor.
Once everything checks out, screw the NFC/wireless modules back in and get ready to close the device.
Step 9: Seal the Back Glass Like a Pro
-
Clean the inside of the back glass and the frame—any dust left behind will haunt you.
-
Apply new adhesive around the back edges.
-
Carefully place the back panel and press down evenly
-
Use rubber bands or clamps for a firm seal.
-
For best results, let it sit for 30–60 minutes.
Optional: Slightly heat the back once more to help the adhesive cure.
Step 10: Final Checks Before You Celebrate
Once the phone is back together:
-
Turn it on and run through all the basics.
-
Call someone to check your mic and speaker.
-
Test Bluetooth, Wi-Fi, fingerprint sensor, and charging.
-
Open the camera app and toggle between front/rear.
If all systems go—congrats! You’ve just pulled off what many people pay over $200+ to have someone else do.

Frame vs. No Frame: What You Should Know
This is one of the biggest decisions in screen replacement.
-
Screen without frame: Cheaper but riskier. You’ll need to remove the old screen carefully and glue the new one in.
-
Screen with frame: A bit pricier, but way safer and more beginner-friendly. Just transfer your parts into the new frame and you're good.
Most people who are doing this for the first time prefer going with a screen that includes the frame—it cuts your stress in half.
What If I Mess Up?
It happens. A connector doesn’t snap back. The display flickers. You lose a screw.
If that’s the case, don’t panic. You can:
-
Rewatch a teardown video (YouTube has great ones)
-
Retrace your steps—something may just be loose
-
Ask for help on tech forums like iFixit or Reddit
-
Or send it to a pro. Again, E-Tech Parts Plus is a solid choice. They offer both replacement parts and affordable repair services if you decide to pass the wrench.
Samsung S8 Screen Replacement Price: What to Expect
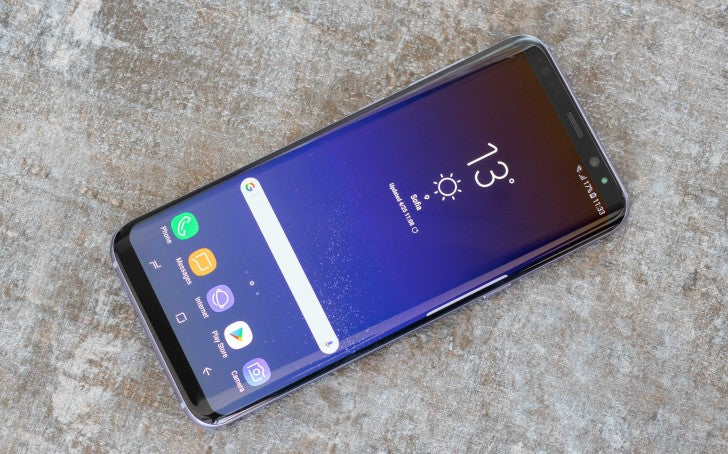
The Samsung Galaxy S8, with its edge-to-edge Infinity Display and sleek curves, was a game changer in smartphone design. But as stunning as that 5.8-inch Super AMOLED display may be, it's also highly vulnerable.
Cracked glass, dead pixels, touch screen issues—these are unfortunately common. And when that happens, one of the first questions users ask is: “How much will it cost to replace my Samsung S8 screen?”
At E-tech61, we understand just how stressful screen damage can be. We also know that screen replacement pricing can be confusing and inconsistent depending on where you look.
That’s why we’ve put together this in-depth guide—to help you understand what you should expect to pay, what options you have, and how you can save money while ensuring quality.
Why Samsung S8 Screens Are Expensive to Replace
The Galaxy S8 was one of the first smartphones to have curved-edge AMOLED displays with pressure-sensitive touch response and a high resolution of 1440 x 2960.
While this is obviously the best user experience, this also raises the overall cost of manufacturing and repairs.
Different from a standard flat display, the Samsung edge screen is fused together, as the digitizer (touch sensor), glass, and display all together as one unit.
This makes it impossible to replace just the glass. If your display is cracked or unresponsive, you’ll almost always need a full screen assembly replacement, which is the most expensive type of screen repair.
Cost for Samsung S8 Screen Replacement?
UK / Europe Pricing
-
Samsung UK recommends approximately £170 for an S8 screen replacement.
-
Third-party shop RepairMyPhoneScreen.co.uk: £129.
-
SquareRepair in London: £140 for screen repair.
-
Higher-end options (e.g. Samsung's own store via Reddit) ran up to £260.
General phone screen repairs in the UK typically range from £15 to £265, depending on component quality and service.
Authorized Service Center vs. Third-Party Repair Shops: What to Choose?
Choosing where to get your Samsung S8 screen replaced is almost as important as the part itself. Here’s a detailed look at your two main options:
1. Authorized Samsung Service Centers
-
Pros:
-
Guaranteed genuine parts
-
Professional installation
-
Warranty-backed service
-
Cons:
-
Very high pricing, often exceeding PKR 18,000
-
Repairs can take longer
-
Limited locations and availability
2. Third-Party Repair Shops
-
Pros:
-
Affordable pricing
-
Faster turnaround time
-
Flexible options based on your budget
-
Cons:
-
Risk of poor-quality parts
-
No guarantee of skilled workmanship
-
Warranty not always offered
This is where E-tech61 bridges the gap. We ensure authenticity and affordability, supplying only vetted screen replacements that pass our internal quality checks.
We also work with experienced technicians, so you can enjoy the best of both worlds—dealer-grade performance at local shop prices.
What’s Included in a Samsung S8 Screen Replacement Kit?
When you order your screen from E-tech61, here’s what’s included:
-
Full Display Assembly: AMOLED screen + digitizer + glass
-
Pre-applied adhesive (if specified)
-
Guidance for professional installation if needed
-
Optional repair partner access in major cities
We believe in transparency. That means you won’t have to guess what you’re getting—and you won’t be hit with surprise costs after the fact.
Signs That Samsung S8 Screen Replacement Is Needed
Sometimes, the damage is obvious—a shattered screen that bleeds color or flickers uncontrollably. But there are subtle signs that may also indicate the need for replacement:
-
Ghost touch issues (screen reacts on its own)
-
Unresponsive areas or delayed touch feedback
-
Visible dead pixels or vertical lines
-
Dark spots or color distortion
-
Screen detachment from frame
If you’re facing any of these issues, don’t wait. Continued usage can worsen the damage, making future repairs more expensive or even impossible.
Should You Replace the Screen Yourself?
If you’re technically inclined and confident, DIY screen replacement can save you money. However, we recommend this only if you have experience with smartphone repair tools.
Things to consider:
-
The Samsung S8 has a sealed design, so removing the back cover without damaging internal components requires a heat gun, suction cup, and prying tools.
-
Mishandling can damage internal wiring, battery, or motherboard.
-
Applying adhesive incorrectly can result in loose screen fitting or display failure over time.
How Long Does a Screen Replacement Take?
-
DIY Repair: 45 to 90 minutes
-
Professional Repair: 30 minutes to 1 hour
-
Authorized Service Center: 1 to 3 days
Speed is important—but so is quality. A rushed job using inferior adhesives can lead to screen lift or internal short circuits. Our repair partners at E-tech61 follow best practices, ensuring each replacement is done with precision and proper sealing techniques.
Why E-Tech61 Is Your Best Choice for Samsung S8 Screen Replacements?
We don’t just sell spare parts—we curate and quality-check every single product before it hits our digital shelves. As your go-to ecommerce destination for mobile spare parts, we strive to offer a comprehensive and unparalleled shopping experience.
Here’s why thousands trust E-tech61:
-
Genuine OEM and OEM-grade screens
-
Nationwide delivery in 1–3 working days
-
100% satisfaction guarantee
-
Competitive prices with no hidden fees
-
Friendly customer service, always ready to help
-
Repair assistance via our verified service partners
Conclusion: Invest in the Right Screen Replacement
Samsung S8 Screen Replacement isn't just about fixing a crack—it's about restoring your phone's visual clarity, functionality, and daily utility. Settling for cheap, low-quality parts may cost you more in the long run—both in money and frustration.
At E-tech61, we’re committed to making this process simple, transparent, and affordable. Whether you’re looking for a top-tier OEM screen or a budget-friendly alternative that performs, we’ve got you covered—with support every step of the way.
Don’t wait for your screen to get worse. Visit E-tech61 today and restore your S8’s brilliance with a screen that lasts.
Share:
Why Can’t I Unsend a Message on iMessage iOS 16?
How to Change Samsung Galaxy S8 Screen? | E-TECH61